All the world of cacao in one click.
Elevate your dessert game with our tutorial on mastering dark chocolate sea salt caramels. Achieve the perfect texture every time.
Mastering the art of creating decadent caramels requires precision and care, particularly when it comes to temperature control. You will learn how to elevate your dessert game with our tutorial on crafting rich, indulgent treats that delight the senses.
Understanding the basics of artisanal caramels is crucial, and achieving the perfect texture every time starts with temperature mastery. By following our step-by-step guide, you will be able to create these delicious treats with ease.
The art of artisanal caramel making hinges on understanding the basics of sugar stages and temperatures. To create the perfect soft caramel core, you need to master the process of caramelization.
As René Descartes once said, “The sense of taste is a kind of confused thought.” This is particularly true when it comes to the nuanced process of caramel making. Understanding the stages of sugar cooking is crucial.
“The art of making caramel is not just about following a recipe, it’s about understanding the chemistry behind it.” –
To achieve the perfect soft caramel core, follow these steps:
Here’s a step-by-step guide to achieving the perfect soft caramel core:

By mastering these basics, you’ll be well on your way to creating artisanal caramels with a perfect soft caramel core.
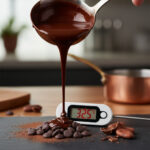
The key to making superior caramels lies in understanding and controlling sugar temperatures. When you heat sugar, it goes through various stages, each with its own characteristics and uses in candy making.
A candy thermometer is an indispensable tool for monitoring the temperature of your sugar mixture. It allows you to accurately determine when the mixture has reached the correct stage for caramel production.
To use a candy thermometer effectively:
Here are the steps to monitor sugar stages using a candy thermometer:

By carefully monitoring the temperature and understanding the different stages of sugar caramelization, you can achieve the perfect texture and flavor for your caramels.
To create a soft and creamy caramel center, you need to carefully craft the caramel mixture. This involves understanding the ingredients and their proportions.
The caramel mixture is the heart of your artisanal caramels. To make it, you’ll need to combine the right ingredients in the correct proportions. Precision is key to achieving a smooth and creamy texture.
The ingredients for the caramel mixture are as follows:
| Ingredient | Baker’s Percentage (%) | Quantity (g) |
|---|---|---|
| Granulated Sugar | 100 | 500 |
| Heavy Cream | 50 | 250 |
| Unsalted Butter | 20 | 100 |
| Sea Salt | 2 | 10 |
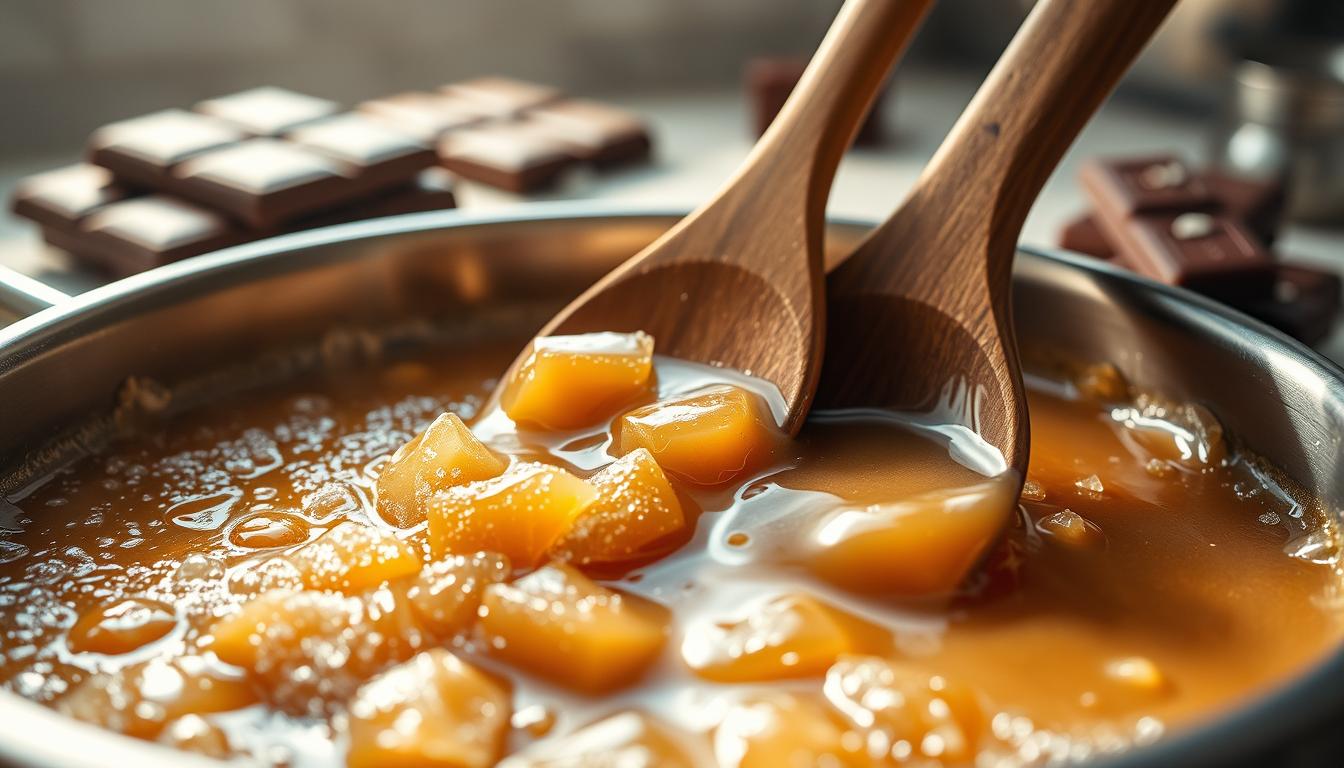
Once you have your ingredients measured out, you can start making the caramel mixture. It’s crucial to heat the mixture slowly to prevent the sugar from crystallizing.

After preparing the caramel mixture, you’ll need to cool it to a temperature that’s suitable for shaping. This step is crucial for achieving the right consistency for your caramel centers.
By following these steps and using the right ingredients, you’ll be able to create a delicious soft caramel core that’s perfect for dipping in chocolate.
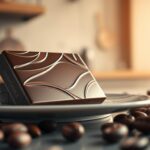
Dipping and enrobing are where the magic happens, transforming your caramel centers into chocolate-coated delights. This process not only enhances the flavor but also adds a luxurious texture to your artisan dark chocolate sea salt caramels.
To enrobe your caramel centers with dark chocolate, you first need to temper the chocolate. Tempering gives the chocolate a smooth and glossy finish. Here’s how you can do it:
Tempering is crucial because it determines the final appearance and texture of your chocolate-coated caramels. “Tempering chocolate is an art that requires patience,” as noted by chocolate makers, “but the result is well worth the effort.”

Once your chocolate is tempered, it’s time to dip your caramel centers. Use a fork or dipping tool to coat the caramels evenly. After coating, sprinkle a pinch of fleur de sel on top of the chocolate before it sets. The fleur de sel adds a touch of saltiness that complements the sweetness of the caramel and the richness of the dark chocolate.
As
“The art of balancing flavors is key to creating confections that are both sophisticated and delicious.”
The right amount offleur de selcan elevate your caramels from good to exceptional.
Despite your best efforts, you may still encounter issues with sticky caramel. This is often related to the sugar stages and caramelization process. Understanding how to adjust these elements can help you achieve the perfect texture.
To avoid sticky caramel, it’s crucial to monitor the sugar stages closely. If your caramel is too sticky, it may be because it hasn’t reached the correct stage. Check your candy thermometer to ensure it has reached the firm-ball stage, around 245°F to 250°F.
Caramelization plays a significant role in the texture of your caramel. If the caramel is heated too quickly or to too high a temperature, it can become too dark or develop an unpleasant flavor. Adjusting the heat and cooking time can help you achieve a smooth, creamy caramel.
By paying close attention to the sugar stages and caramelization process, you can troubleshoot common issues and create caramels with a smooth, velvety texture. Experiment with different temperatures and cooking times to find the perfect balance for your Artisan Dark Chocolate Sea Salt Caramels.