Achieving a clean look in your kitchen is now easier with the right technique. By following this recipe, you will learn how to handle your tools to get a great shine. Professional chefs know that a Mirror Finish is about science as much as flavor.
You must manage the Surface Tension carefully to keep the liquid smooth. Using siphon technology helps you remove trapped air before it ruins your hard work. This method makes sure your cake looks like it came from a professional shop.
| Ingredient |
Baker’s Percentage |
| Granulated Sugar |
100% |
| Water |
45% |
| Glucose Syrup |
100% |
| Condensed Milk |
70% |
| Gelatin Sheets |
15% |
| White Chocolate |
150% |
Follow these steps to prepare your glaze:
- Soak the gelatin sheets in a bowl of ice-cold water until soft.
- Boil the sugar, water, and glucose in a small pot to 217 degrees Fahrenheit.
- Stir in the chocolate and condensed milk until the mixture is fully combined.
- Use the siphon tool to remove all tiny air bubbles from the liquid.
- Pour the warm mixture over a frozen cake for the best results.
Key Takeaways
- Manage liquid physics to ensure a smooth and even surface.
- Use precise Baker’s percentages for consistent results every time.
- Eliminate air bubbles using modern siphon technology for better clarity.
- Select high-quality white chocolate for a bright and clean appearance.
- Maintain the correct pouring temperature to avoid melting your cake.
- Ensure your cake base is completely frozen before you start pouring.
Removing Micro-bubbles
To attain a truly mirror-like finish, understanding and addressing the issue of micro-bubbles is essential. Micro-bubbles can ruin the otherwise perfect glaze by creating imperfections that catch the light and distort the finish due to Refraction. The way light passes through the glaze and is refracted can highlight these bubbles, making them visible to the naked eye.
The process of removing micro-bubbles involves using siphon technology to gently eliminate air bubbles trapped in the glaze mixture. This technique is crucial for achieving a smooth, even finish.
Techniques for Micro-bubble Removal
To effectively remove micro-bubbles, follow these steps:
- Prepare your glaze mixture according to the recipe, ensuring that it’s well mixed and free of initial large air pockets.
- Transfer the mixture to a siphon, making sure to minimize the introduction of new air bubbles during this process.
- Use the siphon to dispense the glaze, allowing the pressure from the siphon to help remove trapped air bubbles.
- Gently agitate the glaze after dispensing to release any remaining micro-bubbles.
- Inspect the glaze under appropriate lighting conditions to check for any remaining bubbles, using the principles of light refraction to identify imperfections.
By following these steps and utilizing siphon technology, you can significantly reduce the occurrence of micro-bubbles in your glaze, leading to a smoother, more even finish.

Understanding how light refraction works is key to identifying and eliminating micro-bubbles. As light hits a bubble, it is refracted, or bent, making the bubble visible. By minimizing these imperfections, you can achieve a glaze that has a truly mirror-like quality.
Setting Temperature Precision
Achieving the perfect glaze finish requires precision in multiple factors, with temperature control being paramount. The temperature at which you work with your glaze significantly affects its final appearance and quality.
Maintaining the right temperature is crucial because it directly influences the viscosity of the glaze. Viscosity, in turn, affects how the glaze flows and sets on the surface.
Importance of Temperature Control
Temperature control is vital for ensuring that your glaze achieves the desired consistency and finish. If the glaze is too hot or too cold, it can lead to an undesirable texture or finish.
Achieving the Right Viscosity
To achieve the right viscosity, follow these steps:
- Check the recommended temperature range for your specific glaze.
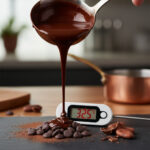
- Use a thermometer to monitor the temperature accurately.
- Adjust the temperature as necessary to fall within the recommended range.
- Test the glaze’s viscosity by performing a simple flow test.
By controlling the temperature and achieving the optimal viscosity, you can ensure a smooth, even glaze application that results in a high-gloss finish.

The step-by-step process outlined above helps you understand the importance of temperature precision in glaze application. By following these guidelines, you can achieve a professional-grade finish with your glaze work.
2026 High-Gloss Standards
To achieve a flawless Mirror Finish that reflects light perfectly, you must adhere to the techniques outlined in the previous sections. By now, you should have a good understanding of how to prepare your glaze, remove micro-bubbles, and control temperature for the perfect Viscosity.
With these skills in place, you’re ready to meet the 2026 high-gloss standards. A Mirror Gloss finish requires attention to detail and a thorough understanding of the glazing process. By following the guidelines outlined in this article, you can achieve a high-gloss finish that is up to the latest standards.
Your final result should be a Mirror Finish that is free of imperfections and showcases your craftsmanship. By mastering the techniques outlined in this article, you’ll be able to achieve a Mirror Gloss finish that exceeds expectations.
FAQ
How does managing Surface Tension prevent imperfections in your glaze?
When you prepare your mixture, Surface Tension acts as the “skin” of the liquid. If the tension is too high, air becomes trapped during the mixing process, leading to unsightly craters. By utilizing Siphon Tech and specific stabilizing ingredients like Valrhona glucose or Silver Leaf gelatin, you lower the resistance, allowing bubbles to rise and dissipate before the glaze sets, ensuring a perfectly smooth application.
Why is light Refraction a critical consideration for a professional finish?
Refraction determines how light passes through and bounces off your glaze. Micro-bubbles act as tiny prisms that scatter light, making your finish appear dull or “cloudy.” By removing these microscopic air pockets, you ensure that light reflects uniformly off the surface, creating the deep, crystal-clear clarity required for a high-end Mirror Finish.
How do you determine the ideal Viscosity for a flawless pour?
Your glaze’s Viscosity is almost entirely dependent on precise temperature control. If the mixture is too warm, it will be too thin to coat the sides of your dessert; if it is too cold, it will be too thick and leave streaks. For modern standards, achieving a “napping” consistency—usually between 89°F and 95°F (32°C – 35°C)—allows the glaze to flow effortlessly over the product while maintaining enough body to stay put.
What makes the “Mirror” Glaze 2.0 different from traditional glazing methods?
The 2.0 method shifts the focus to Siphon Tech and scientific precision. Unlike traditional whisking or basic immersion blending with a Bamix, which can introduce air, this technique uses vacuum-style pressure to draw air out. This evolution ensures your work meets the 2026 High-Gloss Standards, providing a surface so reflective it mimics the properties of a polished glass Mirror Finish.
Can you achieve a 2026-standard finish without specialized equipment?
While traditional tools can produce good results, achieving the elite Mirror Finish expected in contemporary pastry requires the removal of micro-bubbles that the naked eye might initially miss. Using a professional siphon or a vacuum chamber allows you to manipulate the Viscosity and air content of the glaze to a degree that manual stirring simply cannot match, ensuring your work stands up to the scrutiny of high-definition photography and professional judging.